CARNIVÀLE VINTAGE IN EDINBURGH
  • Home
  • Shop Now
  • Vintage Blog
  • Contact Us
  • Vintage Low Down
  • Selling Us Items
  • Home
  • Shop Now
  • Vintage Blog
  • Contact Us
  • Vintage Low Down
  • Selling Us Items

Vintage in Edinburgh

Adding the Ruffle

27/8/2020

2 Comments


So this is where I've completely given up on the pattern and am just winging it.

1. First of all, pop your dressing gown on, on a mannequin or on a hanger and have a look at it. Does it look like there's a nice gradient from the front to lower in the back?

2. Use a tape measure to measure from the edge to the floor for the ruffle and remember to add a bit for seam allowance. I did my ruffle at 15" height, but remember, I'm short! You may well need longer. Ideally you want it just on the floor at the front so it has that insane decadence, and you have a train effect at the back.

3. Measure around the long, long, long edge of your gown. Mine was 228" wow!

4. Decide how much extra volume you want in your ruffle (and check how much fabric you have left!) I went with double my edge so 456" by 15". Remember if you are adding marabou or trim, you are going to need this length of marabou/trim too!

5. You'll likely need to add pieces to make the ruffle. I did two lengths of 228" plus a bit for seam allowance and made a centre back seam. To do so with a French seam, wrong sides together, pin, sew 3/8", press, trim, flip and sew 1/4", and press to one side.

6. Finish the short edges of the ruffle as we have done previously with a straight stitch at 3/8", trim and then zig zag over, press. As I was adding marabou, and as tulle does not fray, I left the massive long edge of my ruffle raw.

7. The run a gathering stitch, allllll the way around the ruffle. Due ot the volume, I actually did this in two parts to the centre back seam. Due to the fact that tulle is easy to gather and the volume of fabric, I just used a single gathering stitch, unlike the two I normally use. Just be wary not to pull too hard and snap it when gathering!!

8. Now in an act of complete and utter lunacy, I decided to do a French seam here. It was mental, I don't advice it, it was hell to do. But it does look pretty.

9. Mark the centre back of the gown and pin the middle seam of your ruffle.

10. Pin the edges of the ruffle to the gown.

11. Now gather evenly like a crazy person! You may find it's useful to half and even quarter each section so your gathering is even. Pin, pin, pin!

12. Sew and press your seam (whatever seam treatment you are using).
​
13. Dance around in your frou frou gown.

Picture
2 Comments
Stezylee
6/2/2021 12:06:55 pm

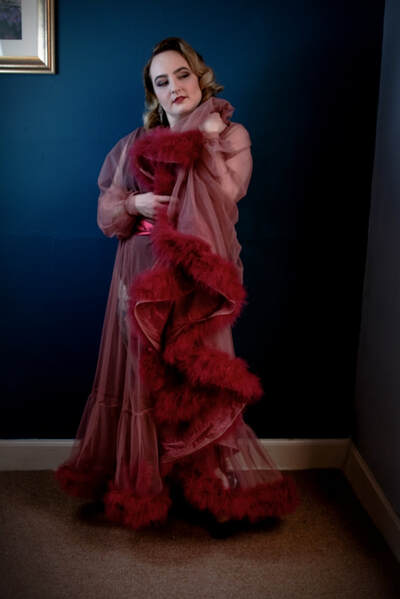
So you made the bottom ruffle twice as big as the top skirt, but I'm curious, what about was the difference between the bodice and the top skirt? A rough idea would be fine. I only have one go at this, and I want to make sure it's not too crazy gathered in the waist.

Reply
Rachael
9/2/2021 06:40:57 pm

Hi so if you look at the simplicity 8013 pattern I used as a basis for this, that's what determines the bodice and skirt parts. There are line diagrams for this pattern available online. My front is not gathered because it's wrapped over and sits relatively flat, it is gathered more at the back and I've deliberately done mine to be more gathered centre back. Tulle sits relatively flat, even when gathered because it is so light, so this also depends on your fabric.

You say you have only one shot at this, so I would suggest doing a muslin first so assess desired fit.

Reply


Leave a Reply.

    Author

    Carnivàle Vintage is owned by Rachael Coutts to fulfill her endless need for vintage clothing and jewellery - once her own home drowned in clothes, it was time to open a shop.

    Archives

    August 2020
    May 2019
    September 2017
    February 2017
    January 2017

    Categories

    All

    RSS Feed

Powered by Create your own unique website with customizable templates.